Taking snapshot of AWS ElasticSearch
Steps to create a manual snapshot of AWS ElasticSearch

I was under the impression that all AWS services have an easy option to take snapshots like RDS, EBS etc., but with ElasticSearch, things are a bit tricky.
This blog will show you how to take snapshots of AWS ElasticSearch based on my experience.
If you want to follow the official documentation, you can do that here.
Below is how I did it. Based on your environment it might differ, so feel free to add remove or change any steps to make it working in your environment.
Backup S3 bucket creation
The first step is to create an S3 bucket where you'll keep the backup snapshots from ElasticSearch.
For that, go to the S3 console and create an appropriate bucket.
Lets call it
some-name-es-backupAWS IAM Role creation
For this, you can follow the same steps as mentioned in the original documentation. I shall summarise it as follows.
First create the Role for ElasticSearch
Create a new role with any trusted entity, it doesn't matter which you choose because we will be changing it after the creation
In the role, give the following permission in JSON.
{
  "Version": "2012-10-17",
  "Statement": [{
      "Action": [
        "s3:ListBucket"
      ],
      "Effect": "Allow",
      "Resource": [
        "arn:aws:s3:::some-name-es-backup"
      ]
    },
    {
      "Action": [
        "s3:GetObject",
        "s3:PutObject",
        "s3:DeleteObject"
      ],
      "Effect": "Allow",
      "Resource": [
        "arn:aws:s3:::some-name-es-backup/*"
      ]
    }
  ]
}
After creation, change the trust relationship with the following JSON
{
  "Version": "2012-10-17",
  "Statement": [{
    "Sid": "",
    "Effect": "Allow",
    "Principal": {
      "Service": "es.amazonaws.com"
    },
    "Action": "sts:AssumeRole"
  }
 ]
}
Now that the role is created, you can move on to setting up your own user permission. If you are an Admin, no worries you have the permission
In short, your user should have two accesses
iam:PassRoleto the role created in the previous step, and
es:ESHttpPutto the ElasticSearch domain.
SSH Tunnel through SSH config
I did it by creating an SSH tunnel to the ElasticSearch cluser. You can do that with the following entry in ~/.ssh/config file
Host some-name-es
        Hostname xxx.xxx.xxx.xxx
        User ec2-user
        IdentityFile /home/vignesh/path/to/key.pem
LocalForward 10443 vpc-<esclustername>-es-<xxxxxxxx>.<region>.es.amazonaws.com:443Running the following command activates the above configuration and connects to the server and tunnels a localhost port 10443 to the ElasticSearch 443 port
ssh some-name-esOnce that is done, the terminal where it was run will login to the server like below
vignesh@Workstation:~$ ssh some-name-es
Last login: Mon May 10 13:44:52 2021 from ec2-nnn-nnn-nnn-nnn.<region>.compute.amazonaws.com

       __|  __|_  )
       _|  (     /   Amazon Linux 2 AMI
      ___|\___|___|

https://aws.amazon.com/amazon-linux-2/
16 package(s) needed for security, out of 29 available
Run "sudo yum update" to apply all updates.
[ec2-user@ip-ppp-ppp-ppp-ppp ~]$ Keep it as it is and open your web browser and type in the following URL to access Kibana
https://localhost:10443/_plugin/kibana/Click advance and proceed to ignore the SSL error.

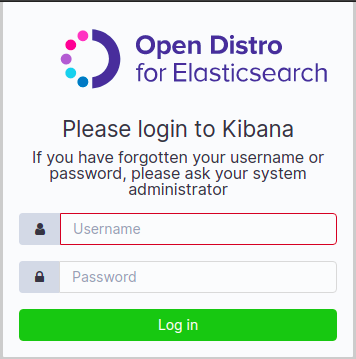
Login to Kibana with the admin access.
Allow permission to the user and BackendRole
To create snapshots, you need permission to manage the snapshots inside Kibana. For that you need to map your IAM user and the S3 Access IAM role to manage_snapshot role in Kibana.
Now that you have gotten the access to Kibana, click the burger menu on the left.
Clicking the burger menu shows the Security tab.
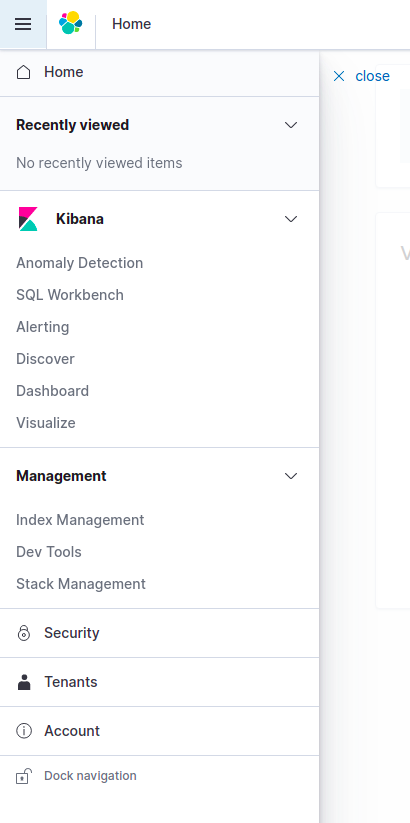
Click the security tab and go to the Role Mapping.
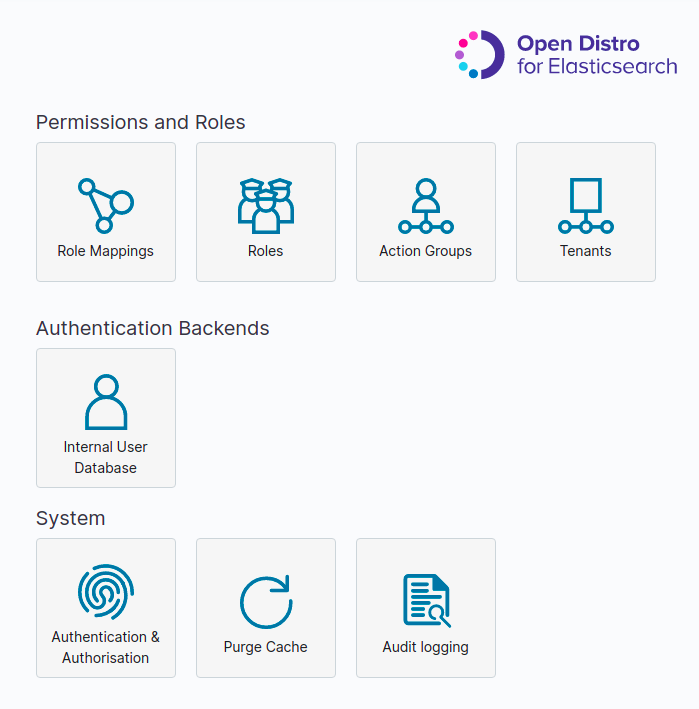
Click Role mapping and click the + button to create a new mapping

Here, select manage_snapshots as the role, enter your IAM user ARN in the Users field and the Role ARN in the Backend roles field.
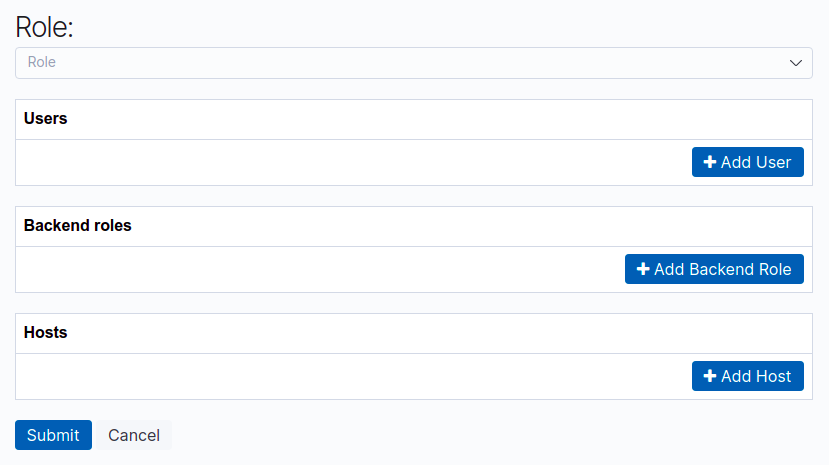
So your user entry will be something like
arn:aws:iam::123456789012:user/some-name-userand the backend role will be something like
arn:aws:iam::123456789012:role/some-name-es-snapshot-roleHit Submit and this section is done.
Creating a snapshot repo in S3 using a python script
Now you have to use a python script to send a signed request to Kibana to set up a snapshot repo in S3
I use profiles in ~/.aws/credentials to access different environments via AWS CLI so I had modified the script in the documentation slightly to work with my setup
So I created a file es_snapshot.py in a folder with the following content
import boto3
import requests
from requests_aws4auth import AWS4Auth

host = 'https://localhost:10443/' # include https:// and trailing /
region = 'ap-northeast-1' # e.g. us-west-1
service = 'es'
credentials = boto3.Session(profile_name='my_profile').get_credentials()
awsauth = AWS4Auth(credentials.access_key, credentials.secret_key, region, service, session_token=credentials.token)

# Register repository

path = '_snapshot/some-name-snapshot-repo' # the Elasticsearch API endpoint
url = host + path

payload = {
  "type": "s3",
  "settings": {
    "bucket": "some-name-es-backup",
    "region": "ap-northeast-1",
    "role_arn": "arn:aws:iam::123456789012:role/some-name-es-snapshot-role"
  }
}

headers = {"Content-Type": "application/json"}

r = requests.put(url, auth=awsauth, json=payload, headers=headers, verify=False)

print(r.status_code)
print(r.text)I had also put verify=False in the request since the SSL verificaiton will not work due to tunneling.
But to do the above, you'll need to create a python virtual environment
For that, run the following commands
Install the python virtual environment package
sudo apt install python3-venvGo to the folder where you have created the above python file and run the following command to create the virtual environment
python -m venv .Now activate the virtual environment with the following command
source ./bin/activateNow install the required modules for the python script
pip install boto3 requests requests_aws4authNow run the following command to execute the python script
python es_snapshot.pyThis is only a one time requirement to create a snapshot repo in an S3 bucket for a single ElasticSearch cluster.
When you run this, you should get something like the following
python es_snapshot.py
/home/vignesh/ESBackup/lib/python3.8/site-packages/urllib3/connectionpool.py:1013: InsecureRequestWarning: Unverified HTTPS request is being made to host 'localhost'. Adding certificate verification is strongly advised. See: https://urllib3.readthedocs.io/en/latest/advanced-usage.html#ssl-warnings
  warnings.warn(
200
{"acknowledged":true}
Only care about the 200 acknowledged:true part.
If you get that, it is successfull.
If you get an error like below, then you have done something wrong in the role mapping step
python es_snapshot.py
/home/vignesh/ESBackup/lib/python3.8/site-packages/urllib3/connectionpool.py:1013: InsecureRequestWarning: Unverified HTTPS request is being made to host 'localhost'. Adding certificate verification is strongly advised. See: https://urllib3.readthedocs.io/en/latest/advanced-usage.html#ssl-warnings
  warnings.warn(
403
{"error":{"root_cause":[{"type":"security_exception","reason":"no permissions for [cluster:admin/repository/put] and User [name=arn:aws:iam::123456789012:user/some-name-user, backend_roles=[], requestedTenant=null]"}],"type":"security_exception","reason":"no permissions for [cluster:admin/repository/put] and User [name=arn:aws:iam::123456789012:user/some-name-user, backend_roles=[], requestedTenant=null]"},"status":403}
Time to create the snapshots
To create a manual snapshot, first check if a snapshot process is currently happening because multiple snapshots cannot be taken at the same time. For that run the following curl request (Make sure that the tunnel is still active)
curl -k --user 'esadmin:thelongestpa$$w0rd' -XGET 'https://localhost:10443/_snapshot/_status'If you get some output like the following, then we are ready to take the snapshot
{"snapshots":[]}To take a snapshot, run the following curl request
curl -k --user 'esadmin:thelongestpa$$w0rd' -XPUT 'https://localhost:10443/_snapshot/some-name-snapshot-repo/some-name-snapshot-2021-05-10'You should see the output
{"accepted":true}Now to check the status of the snapshot, send the following request
curl -k --user 'esadmin:thelongestpa$$w0rd' -XGET 'https://localhost:10443/_snapshot/some-name-snapshot-repo/some-name-snapshot-2021-05-10?pretty'You should see someting like the following if it was successfull
{
  "snapshots" : [ {
    "snapshot" : "some-name-snapshot-2021-05-10",
    "uuid" : "ps2Zd1ToQwuSdddj38dWq2",
    "version_id" : 7080099,
    "version" : "7.8.0",
    "indices" : [ "activity", ".kibana_-2060664723_esadmin_1", ".opendistro_security", ".kibana_1" ],
    "include_global_state" : true,
    "state" : "SUCCESS",
    "start_time" : "2021-05-10T13:38:14.549Z",
    "start_time_in_millis" : 1620653894549,
    "end_time" : "2021-05-10T13:38:18.150Z",
    "end_time_in_millis" : 1620653898150,
    "duration_in_millis" : 3601,
    "failures" : [ ],
    "shards" : {
      "total" : 4,
      "failed" : 0,
      "successful" : 4
    }
  } ]
}
Taking a snapshot does not require you to sign your requests since it is done by elastic search with our user ARN and the backend role.
But you can replace the repository registration part of the previous script with the following snippet if you want to use signed requests to take snapshots. This can also help you manage the entire process in a single file.
# # Take snapshot
path = '_snapshot/some-name-snapshot-repo/some-name-snapshot-2021-05-10'
url = host + path
r = requests.put(url, auth=awsauth)
print(r.text)
Now if something goes south, you have to restore the snapshot
For restoring the snapshot you created, you cannot run the following command because restoring requires signed URL.
curl -k --user 'esadmin:thelongestpa$$w0rd' -XPOST 'https://localhost:10443/_snapshot/some-name-snapshot-repo/some-name-snapshot-2021-05-10/_restore'
If you run the above curl command to restore the snapshot, you will see the following error
{"error":{"root_cause":[{"type":"security_exception","reason":"no permissions for [] and User [name=esadmin, backend_roles=[], requestedTenant=null]"}],"type":"security_exception","reason":"no permissions for [] and User [name=mexp-preprodesadmin, backend_roles=[], requestedTenant=null]"},"status":403}So you have to use the following snippet in the previous python script to restore the snapshot. You can comment the previous repository registration script and put the following snippet and run it.
path = '_snapshot/some-name-snapshot-repo/some-name-snapshot-2021-05-10/_restore'
url = host + path

payload = {
  "indices": "-.kibana*,-.opendistro_security",
  "include_global_state": False
}

headers = {"Content-Type": "application/json"}

r = requests.post(url, auth=awsauth, json=payload, headers=headers, verify=False)

print(r.text)
Running the above script will show the following output if successful
{"accepted":true}Conclusion
That's it, you have successfully taken the snapshot of ElasticSearch in AWS and you can restore it if something goes wrong.