Add additional disk in Azure Virtual Machine - No downtime


If you have a virtual machine in Azure which is running out of space, follow the below instruction to add additional disk to the VM. As usual, like all other Azure things, increasing the capacity of a volume is not simple or intuitive like AWS. Increasing the disk space of a running system is not possible since it requires you to shut down your VM, increase the disk space and then start the VM again. So another solution is to add an additional volume. So read more to find out how.
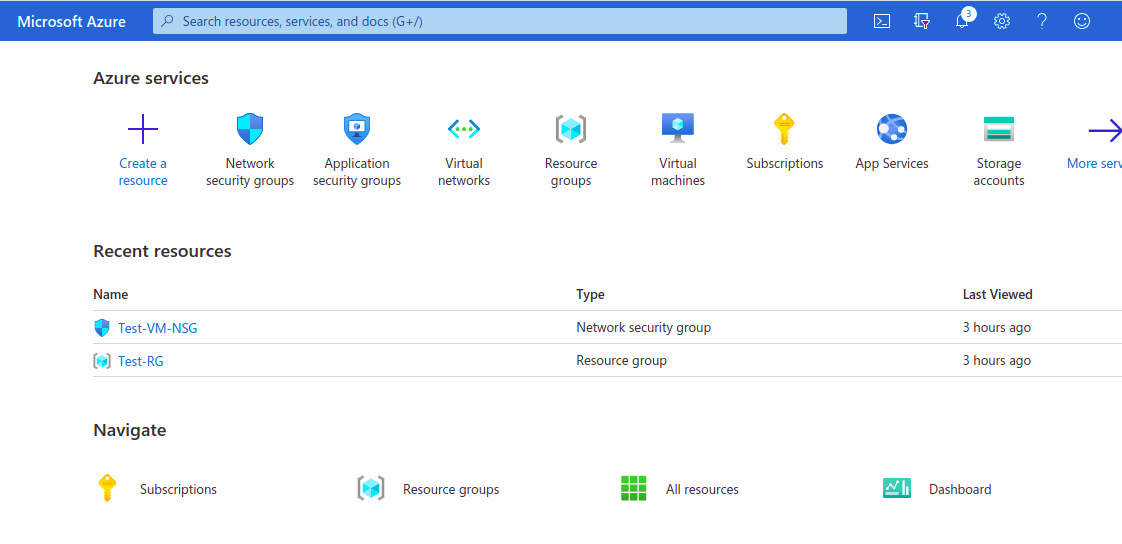
Login to Azure
Login to your azure account through their Azure portal
Go to the Virtual Machine console
Go to the virtual machine console to see the virtual machines
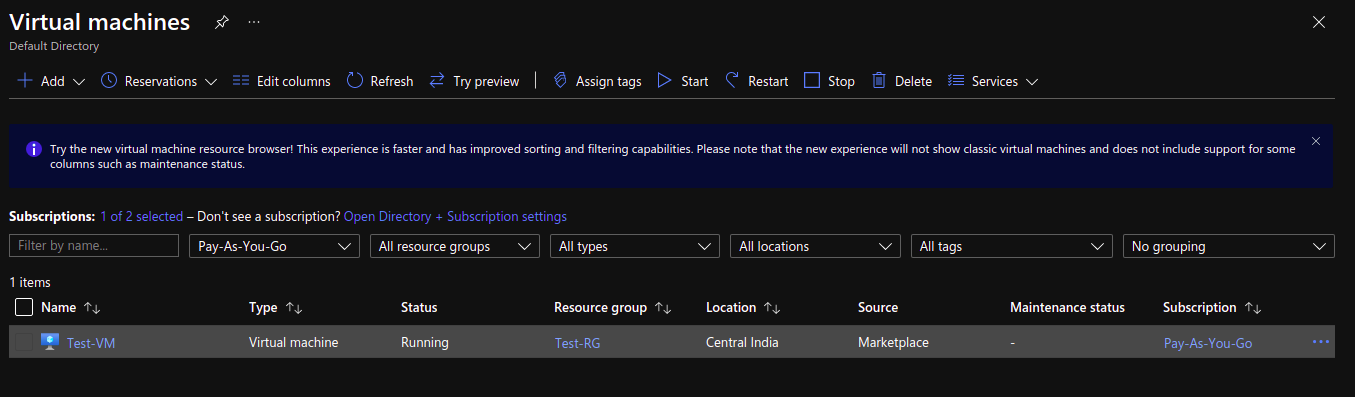
Select the virtual machine
Select the virtual machine which needs the additional disk
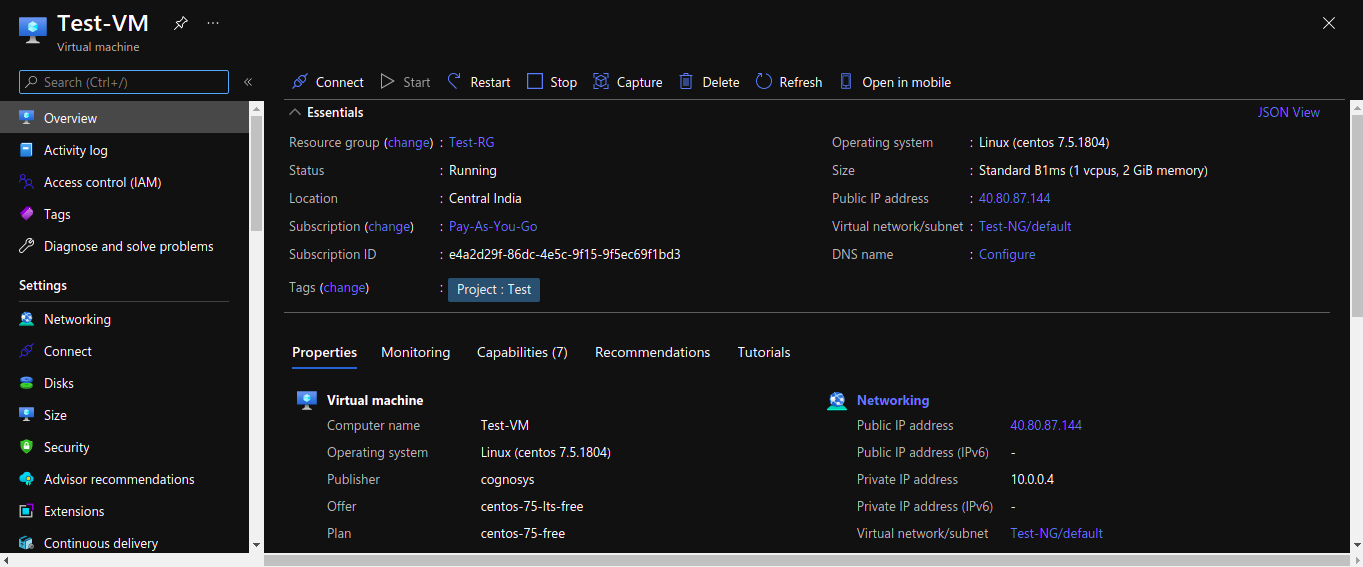
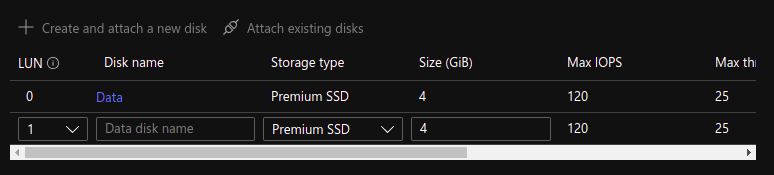
Click on the Disks tab
The disks tab shows all the disks that are attached to the virtual machine
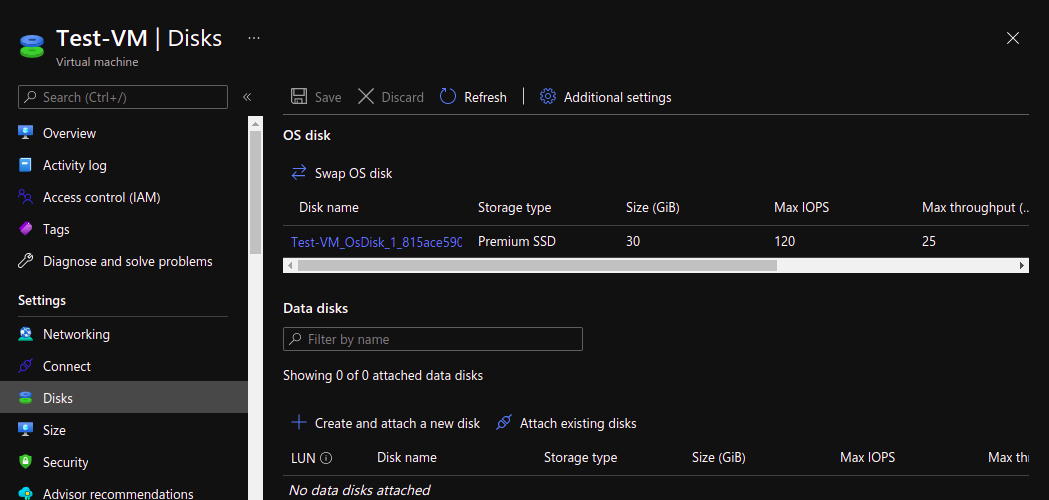
Attach new disk
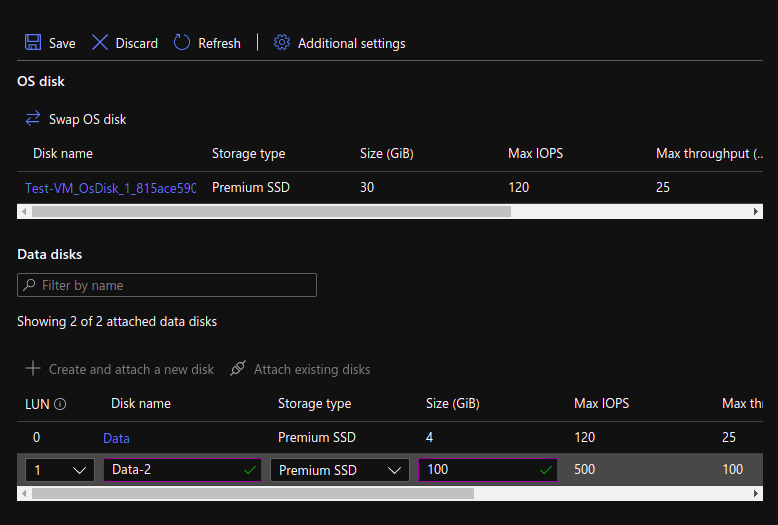
Now attach the disk by clicking Create and attach a new disk

It shows the option to add the new disk.
Fill it with the Disk name, Storage type and Size

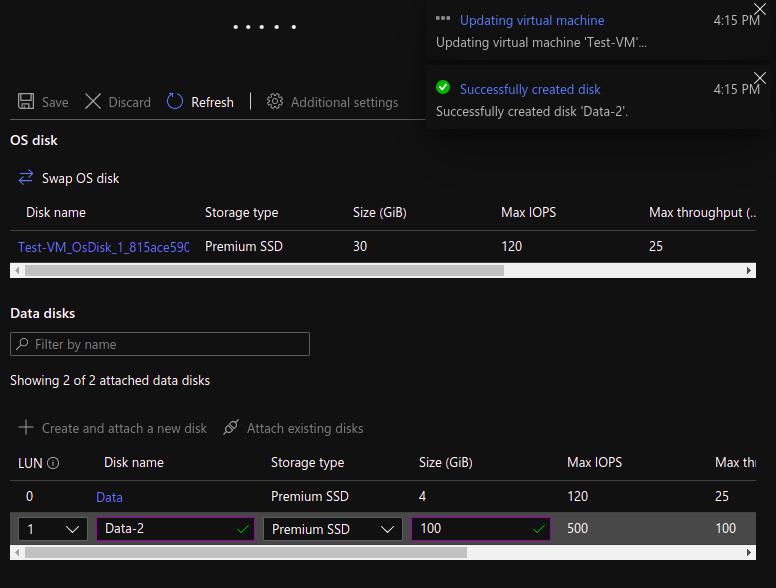
And once that's done, hit Save at the top.
This will show the disk creation and attachment notification.
Login to your server
Login to your server using the credentials that you have
Find the disk
Using the following command, find all the connected disks
lsblk
This will show the disks as below
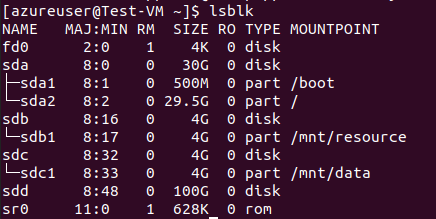
As you can see, it has the newly attached 100G volume sdd
Partition the disk
Now partition the disk with the following command
sudo fdisk /dev/sdd
The fdisk command will show the fdisk session
Type the n command to create a new partition
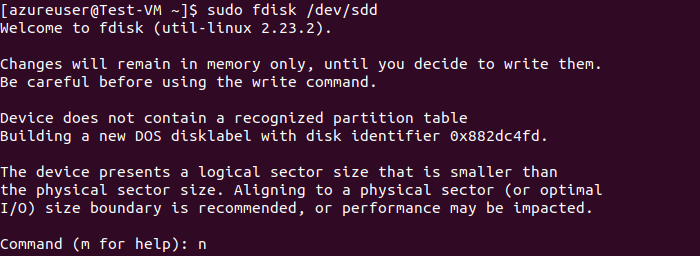
Hit enter for rest of the options because we will not be doing any advanced modifications to the disk as the entire disk will be created as a single partition
So it will be the primary partition, it will be the first partition, starting at the first sector 2048 and ending sector 209715199 and of type Linux.
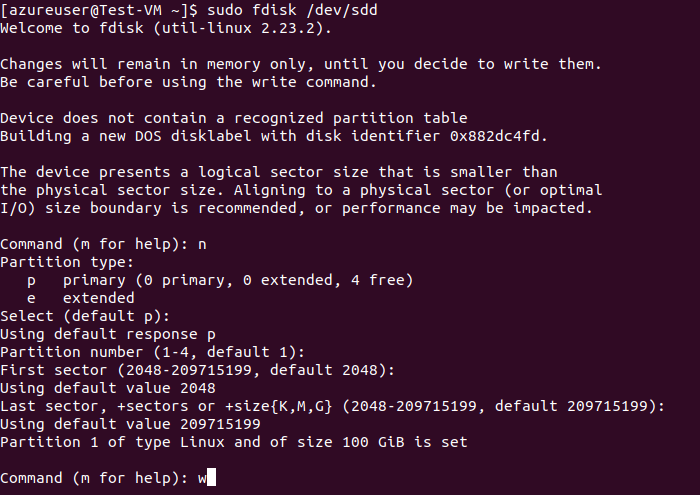
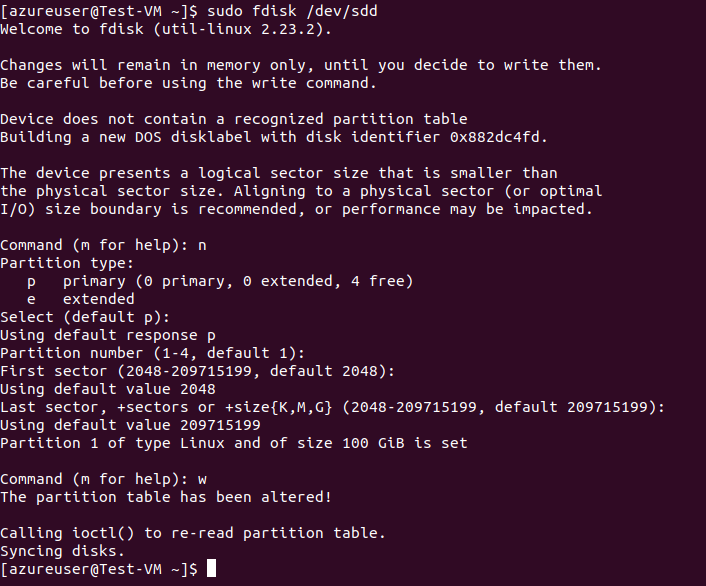
Once that is done, type w and hit enter to write the partition table to the disk.
Make a file system
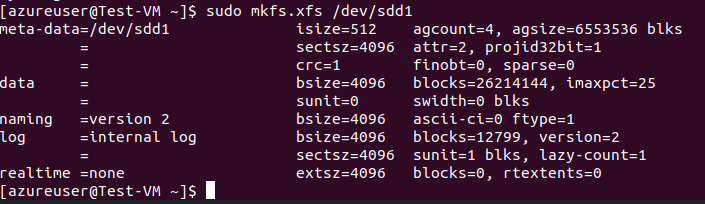
Once the partitioning is done, it is time to make a filesystem, for that, use the following command
sudo mkfs.xfs /dev/sdd1
It will create an xfs file system on the sdd1 partition. Your partition name can vary so change the command accordingly
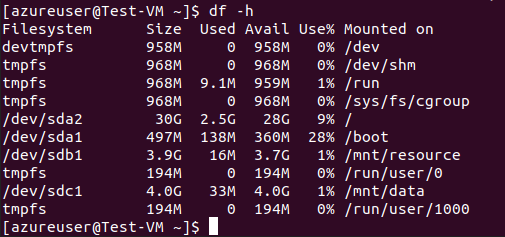
If you check df -h command now, you still will not see the disk because it is not mounted
Now it's time to mount it
For that create an fstab entry (I am using vim for editing, you can use any text editor like nano or vi)
sudo vim /etc/fstab
In that, enter the new partition and mount point in the following format
/dev/sdd1 /mnt/datadir xfs defaults,nofail 0 0
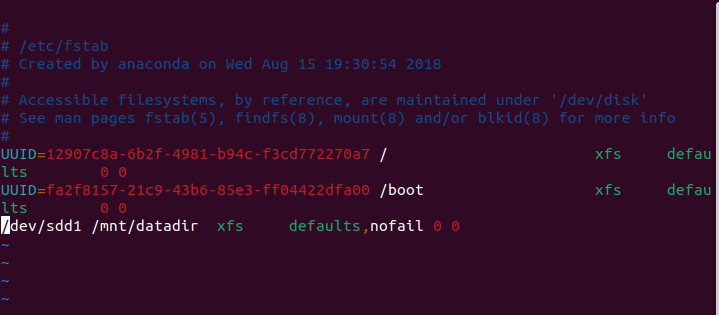
This will mount the disk in the path /mnt/datadir
Save the file with :wq (Write and quit in vim).
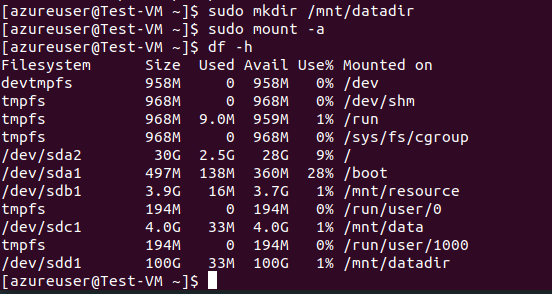
Create the folder as we have given in the fstab entry
sudo mkdir /mnt/datadir
Now run the following command to ensure that the disk gets mounted without any errors
sudo mount -a
Then if you check the the df -h command, you can see it mounted
Conclusion
So that's it. You have attached a new disk to the VM and mounted it. Basically azure made linux work like a Windows machine where you cannot increase the space but just add new disks in separate mount points.
I have no idea why people even use Azure...